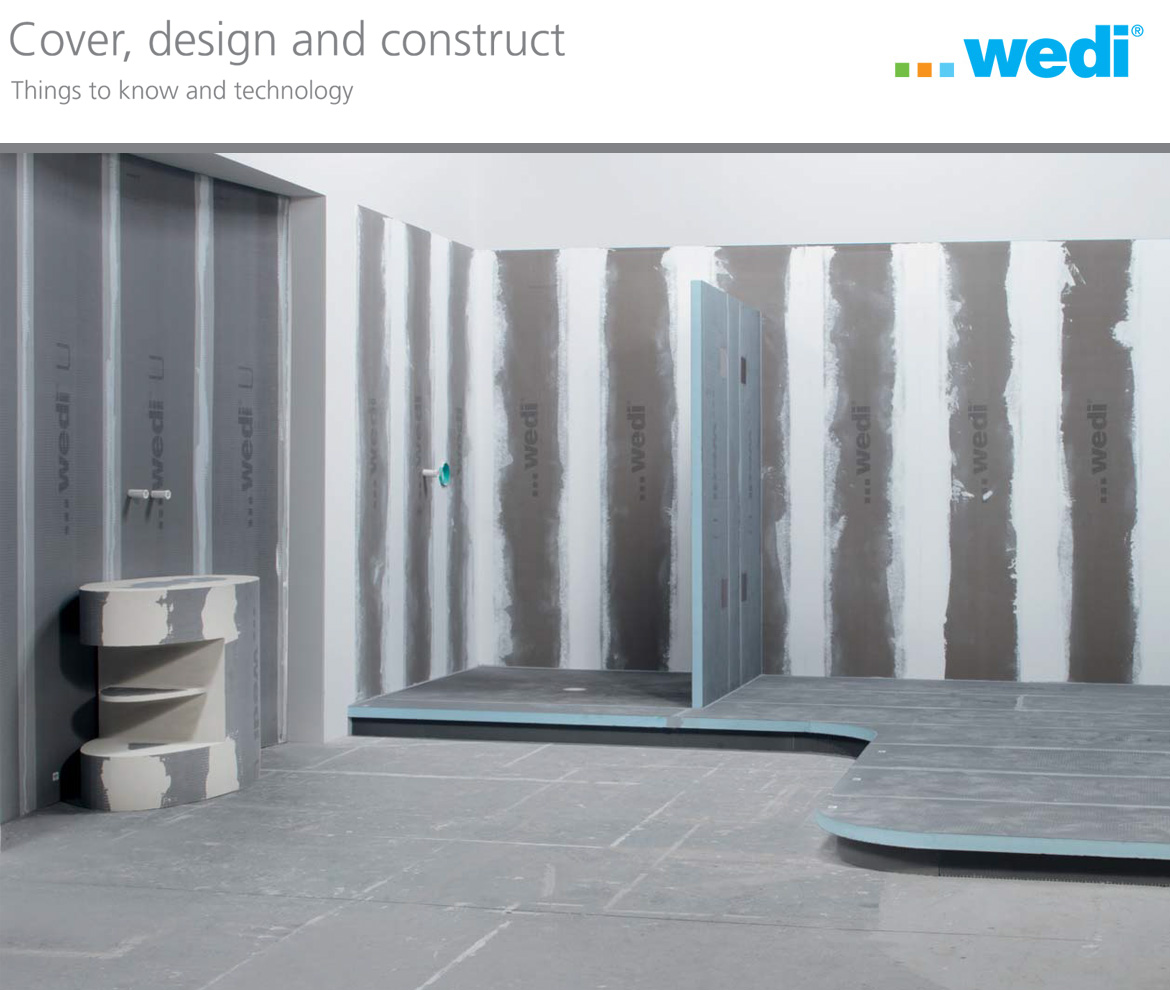
 |
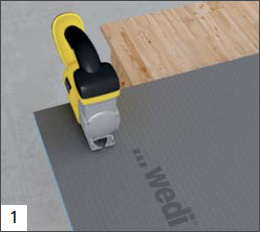
wedi products and systems are of a high standard of quality and have received numerous certifications throughout Europe.
 |
Technical data
wedi building board
|
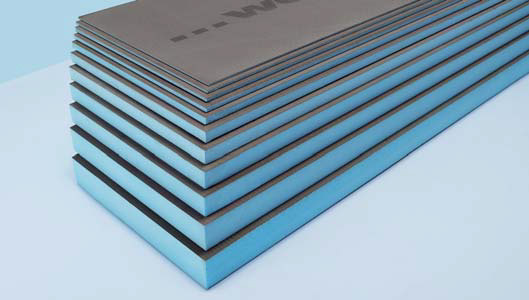
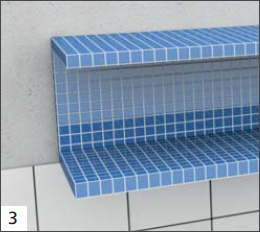
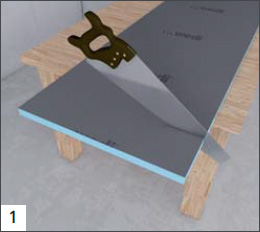
General product description The wedi building board has a blue core made from rigid extruded polystyrene foam. The rigid foam is reinforced with fibreglass fabric on both sides (with alkali-resistant finish) and coated with a polymer-modified cement mortar. Applications With its special properties, the wedi building board has a wide variety of applications:
wedi building boards are approved for indoor use in rooms at normal temperature. Contact your wedi application specialist for advice on special applications (swimming pools, freezer facilities, outdoor areas etc.). wedi building boards are approved for use on floors in rooms with an ordinary residential load. Wheeled loads with high concentrated loads are not permitted. |
Product properties All wedi building boards can be applied to almost any surface. They are waterproof, heat insulating, versatile, lightweight and dimensionally stable, and they can be cut, shaped and installed quickly. Surface requirements, laying Information on the processing and surface requirements can be found in the "General guidelines for use of wedi building boards, wall and floor applications". Form of delivery and storage
|
|
|
The strong tile backing wedi building boardThe completely waterproof building board offers the perfect substrate for ceramic coverings thanks to high adhesion. The joints can be sealed using only wedi 610 – officially approved and tested.
|
Technical properties – Rigid foam
HCFC-free extruded polystyrene rigid foam with closed cell structure and flame-retardant additive.
| Long-term compressive strength (50 years) ≤ 2% compression EN 1606 | .08 N/mm 2 |
| Compressive resistance or compressive strength at 10% compression EN 826 | .25 N/mm 2 |
| Associated modulus of elasticity EN 826 | –18 N/mm 2 |
| Thermal conductivity EN 13164 | .036 W/m K |
| Tensile strength EN 1607 | 0.45 N/mm 2 |
| Shearing resistance EN 12090 | 0.2 N/mm 2 |
| Shear modulus EN 12090 | 7 N/mm 2 |
| Bulk density EN 1602 | 32 kg/m 3 |
| Resistance to water vapour diffusion (μ) EN 12086 | 100 |
| Water absorption under long-term immersion EN 12087 | ≤ 1.5 % by vol. |
| Capillary action | 0 |
| Linear coefficient of thermal expansion | .07 mm/mK |
| Temperature limits | 50°C / +75°C |
| Fire behaviour DIN 4102 | B1 |
| Propellant gas, carbon dioxide, GWP value | 1 |
Technical data of building board
| Fire behaviour DIN 4102-1 (from 4 mm board thickness) | B2 |
| Sound insulation DIN EN ISO 140-3 (at board thickness of 12.5 mm) | Rw,P 23 dB |
| Fire behaviour EN 13501 | E |
| Bending stress based on DIN 53293 | 3900 kPa (mean value) |
| Adhesive tensile strength | 0.28 N/mm 2 |
| Weight: wedi building board (1250 x 600 x 4 mm) wedi building board XXL (2500 x 1200 x 50 mm) |
2.7 Kg 13.8 Kg |
| Linear coefficient of thermal expansion | 0.017 mm/mk |
Technical data
Thermal insulation values of the building board
| Actual U-values incl. transition values | λd=0,036 |
| Nominal thickness in mm |
Net thickness XPS in mm |
R-value (m2 K) / W |
U-value W / m2 K1) |
λd*1,05 = λ Rated value |
| 4 | 2,8 | 0.07 | 4.10 | 0.0378 |
| 6 | 4 | 0.11 | 3.63 | 0.0378 |
| 10 | 8 | 0.21 | 2.62 | 0.0378 |
| 12.5 | 10.5 | 0.28 | 2.23 | 0.0378 |
| 20 | 18 | 0.48 | 1.55 | 0.0378 |
| 30 | 28 | 0.74 | 1.10 | 0.0378 |
| 40 | 38 | 1.01 | 0.85 | 0.0378 |
| 50 | 48 | 1.27 | 0.69 | 0.0378 |
| 60 | 58 | 1.53 | 0.59 | 0.0378 |
| 80 | 78 | 2.06 | 0.45 | 0.0378 |
| 100 | 98 | 2.59 | 0.36 | 0.0378 |
1) When determining the U-value, only the wedi building board and the heat transmission resistances 1/αi and 1/αa for external walls are taken into account. In specific applications, the existing masonry and other layers must also be included.
Building board Construct, longitudinal, calculation of diameter
| Thickness (in mm) | Outer diameter (in mm) | Full circles per board |
|---|---|---|
| 20 | 363 | 0.5 |
| 30 | 538 | 0.4 |
| 50 | 890 | 0.2 |
Building board Construct, transversal, calculation of diameter
| Thickness (in mm) | Outer diameter (in mm) | Full circles per board |
|---|---|---|
| 20 | 363 | 2.2 |
| 30 | 538 | 1.5 |
| 50 | 890 | 0.9 |
Technical data
wedi Moltoromo | Modular wall system
|
General product description wedi Moltoromo is a modular wall system for quick and simple shower or room partitioning. Applications Shower and room partitioning for wet and dry areas that are covered with tiles, slabs or natural stone on at least one side. Product properties
Surface requirements Joints between walls, floor and ceiling should be solid, load-bearing, non-deformable, dry and free of dirt and other contaminants. |
Instructions for subsequent work Tiles, slabs or natural stone coverings and mineral plasters can be applied to the wall segments 24 hours after installation. |
Technical properties – Rigid foam
| Extruded polystyrene rigid foam core | XPS |
| Long-term compressive strength (50 years) ≤ 2% compression DIN EN 1606 | 0.08 N/mm2 |
| Compressive resistance at 10% compression EN 826 | 0.25 N/mm2 |
| Thermal conductivity EN 13164 | 0.036 W/mK |
| Bulk density EN 1602 | 32 kg/m3 |
| Temperature limits | -50°C / +75°C |
| Fire behaviour DIN 4102 | B1 |
| Fire behaviour EN 13501 | E |
Moltoromo technical values
| Element height | 2600 mm |
Surface design
Surface design
Ceramic coverings
|
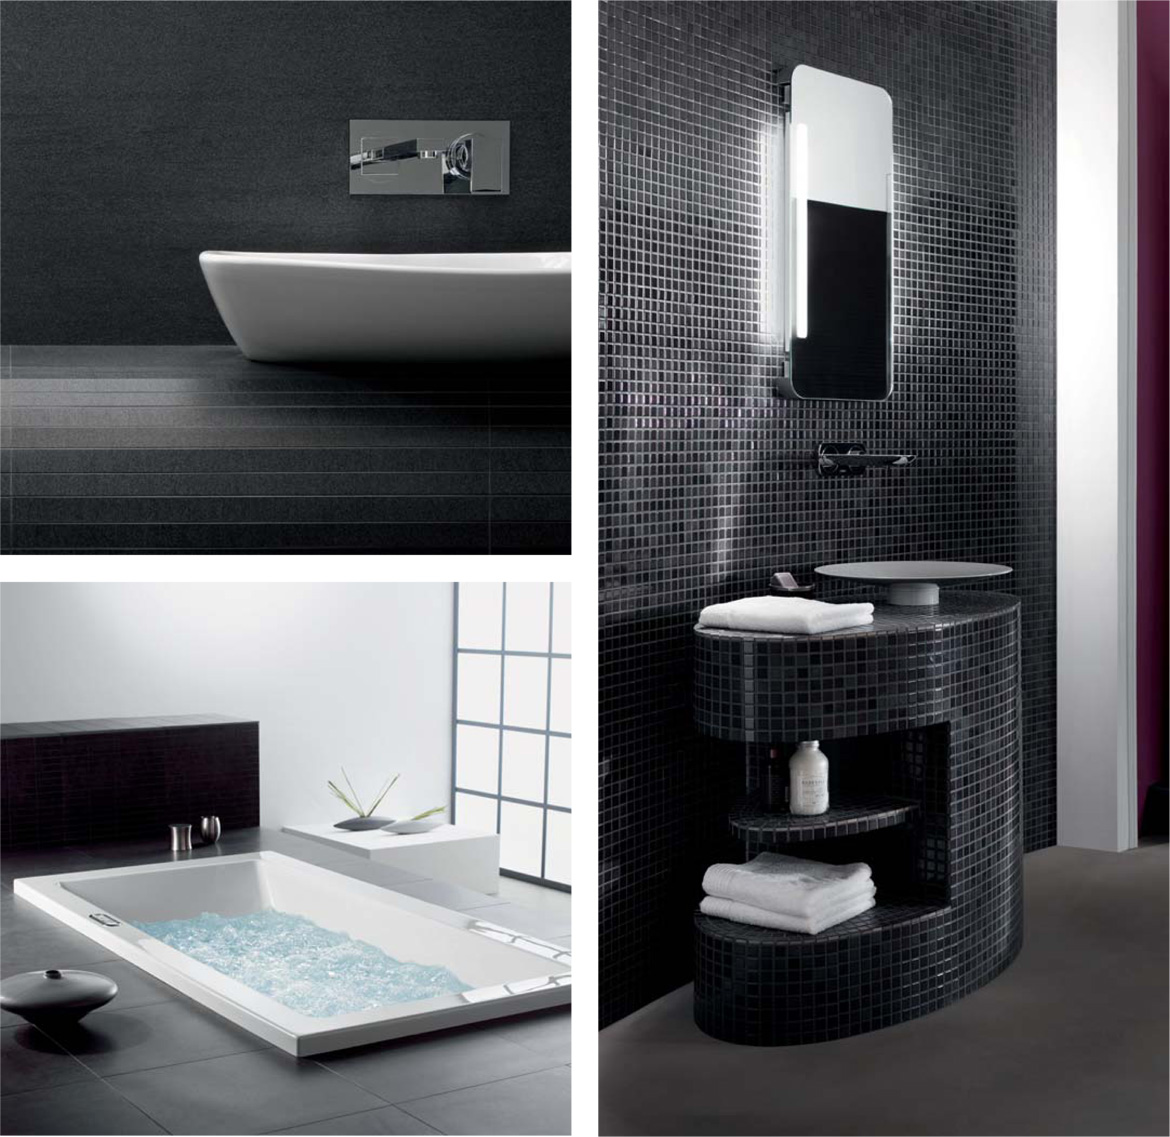
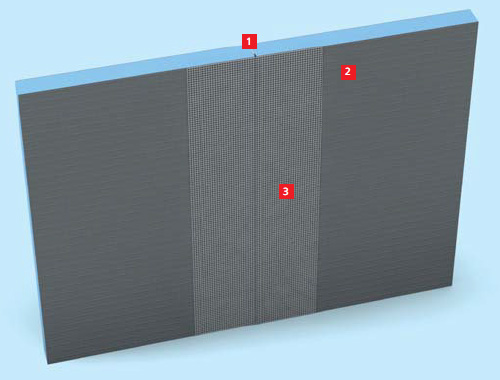
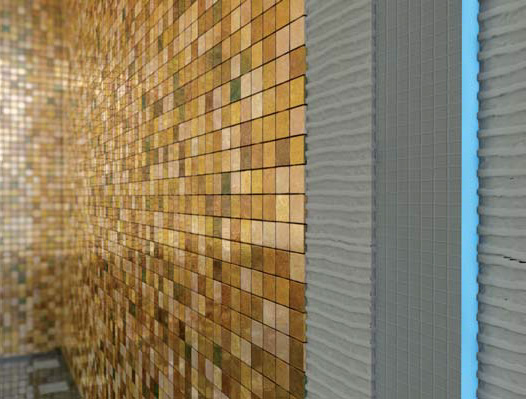
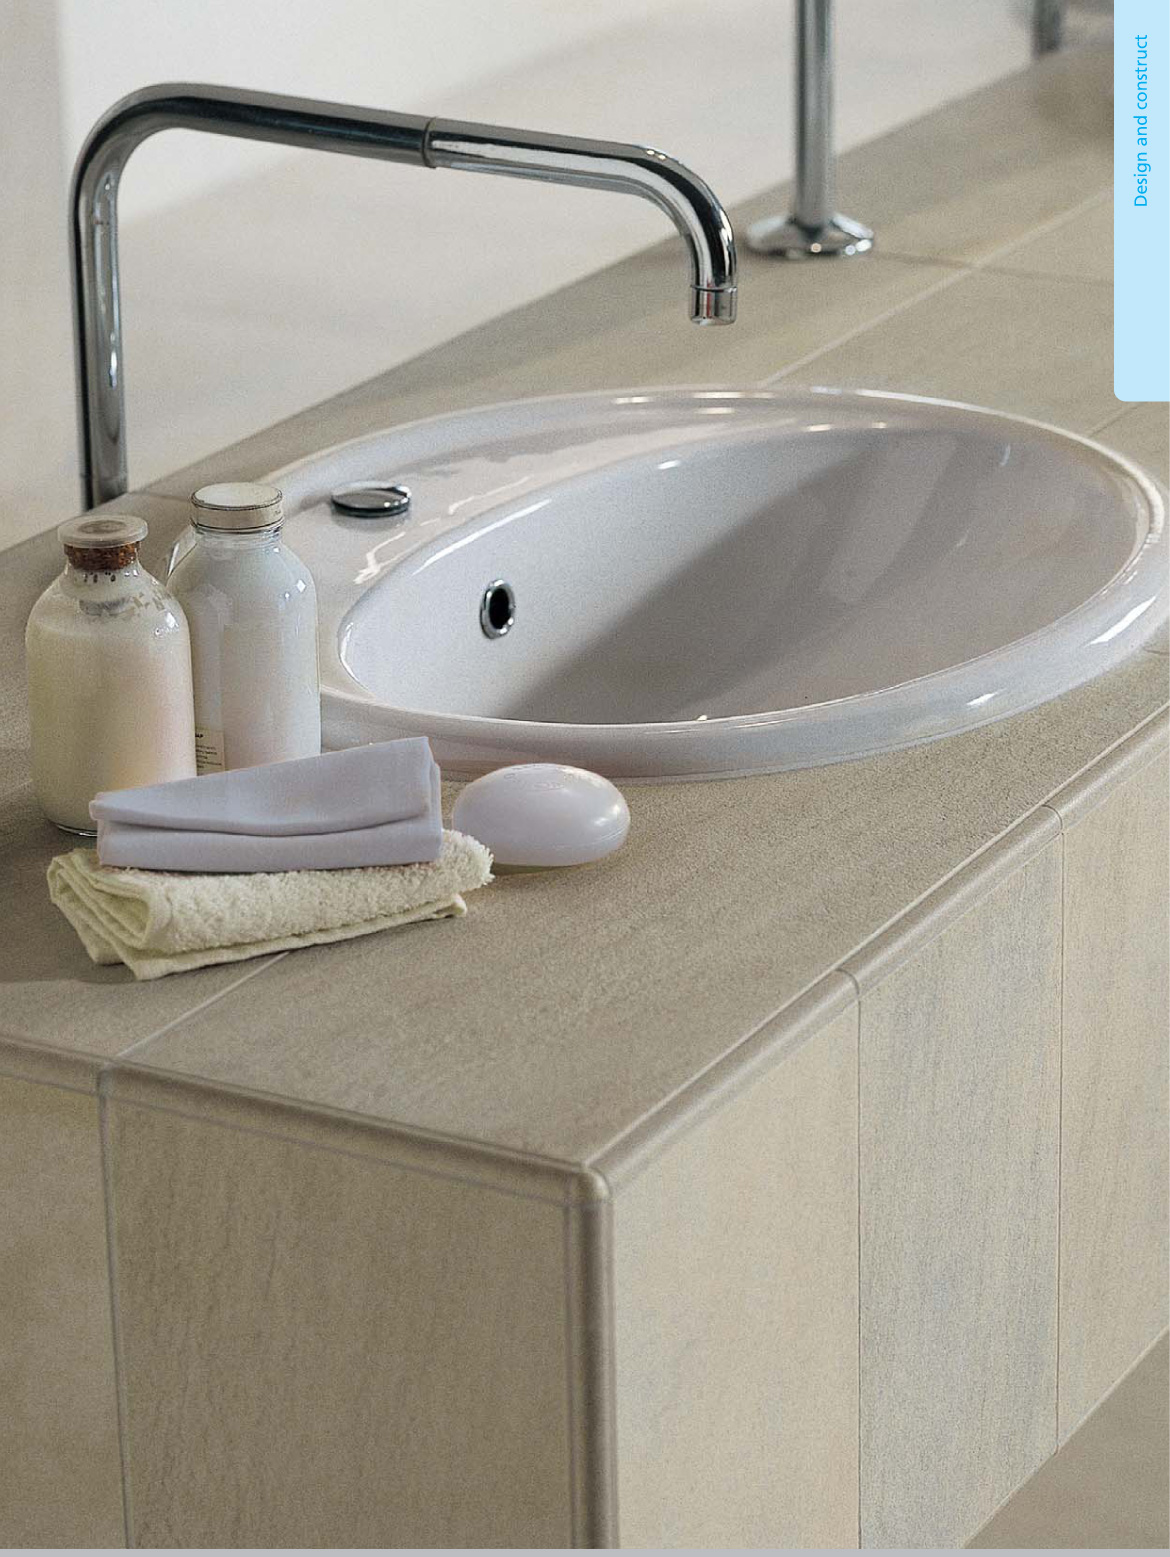
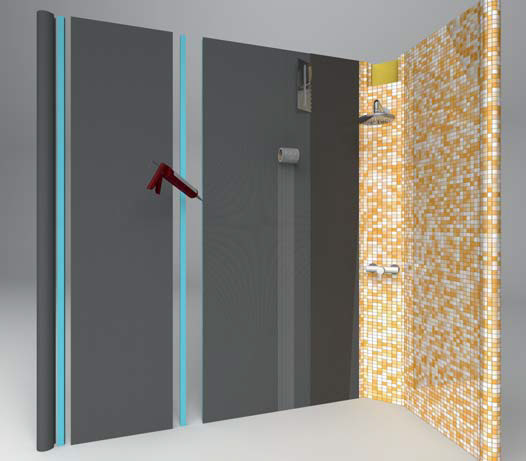
Ceramic coverings offer various possibilities for wall and floor design. Depending on the intended use and personal taste, there is a wide variety of tiles and boards with different shapes, colours and materials. Here, the wedi building board is the perfect carrier element for ceramic coverings as the tile can be installed directly to the board surface without any additional steps needed. |
|
Plasters and fillers
|
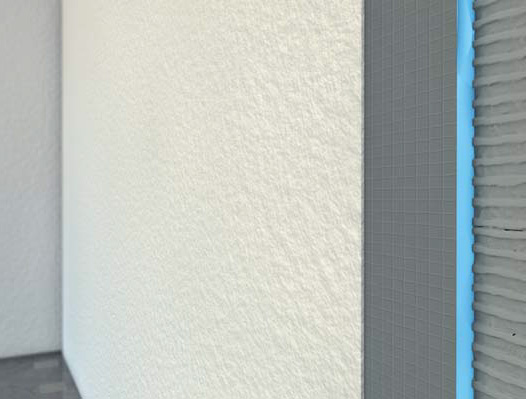
Today, plasters are not only used for creation of a plain surface for tiling, painting or wallpapering, but they also represent a visual design element. Also here, the wedi building board is the perfect substructure. ! Important information: Contact the wedi application specialist for advice on areas with shock loads. Plasters containing gypsum require priming of the building board |
|
Natural stone coverings
|
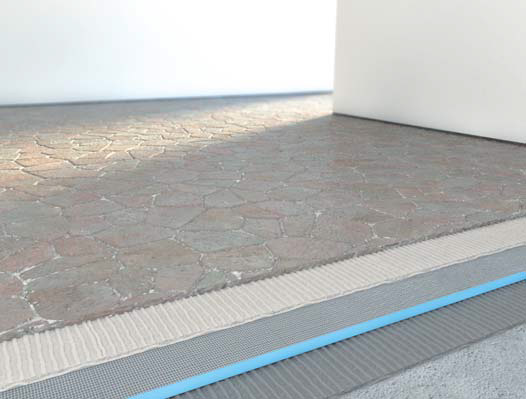
Natural stone coverings have a very particular flair. They are made from natural stones and maintain their visual appearance as they are neither ground nor polished. This results in special characteristics such as the irregular colouration or pattern. wedi building boards are an ideal carrier element and allow for easy and fast installation. |
|
Laminates / ready-to-lay parquets
|
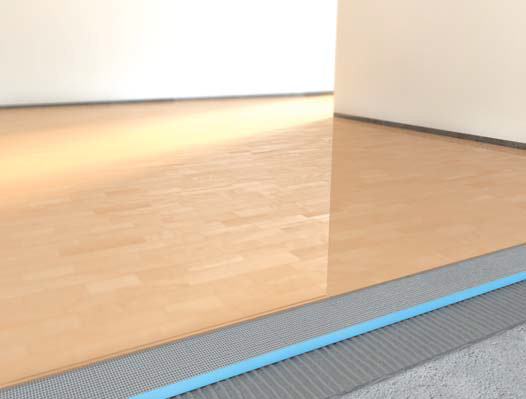
Laminates and ready-to-lay parquets are an alternative to ceramic floor coverings. Laminate is a comparatively low-priced material that is only coated with a decorative layer; parquet is a wooden flooring that – depending on quality – may be very durable. Both floor coverings are available in may different wood designs and colours as well as various qualities. Also here, the wedi building board is the perfect carrier element where the laminate is laid as a floating floor. |
|
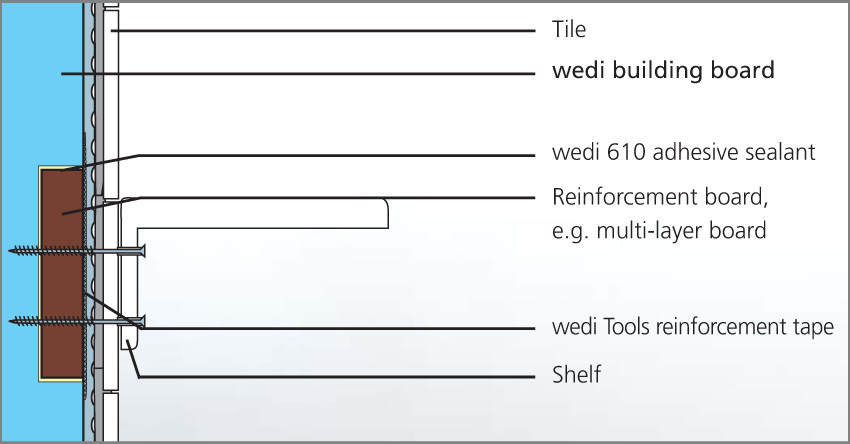
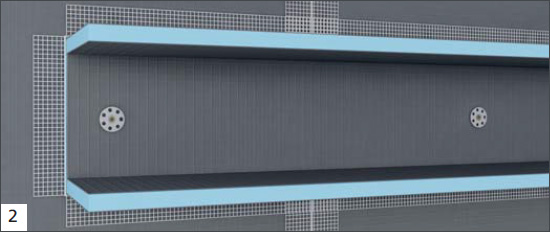
Reinforcement board
Installation of reinforcement boards
|
Fastening behind ceramic. |
|
||||||
|
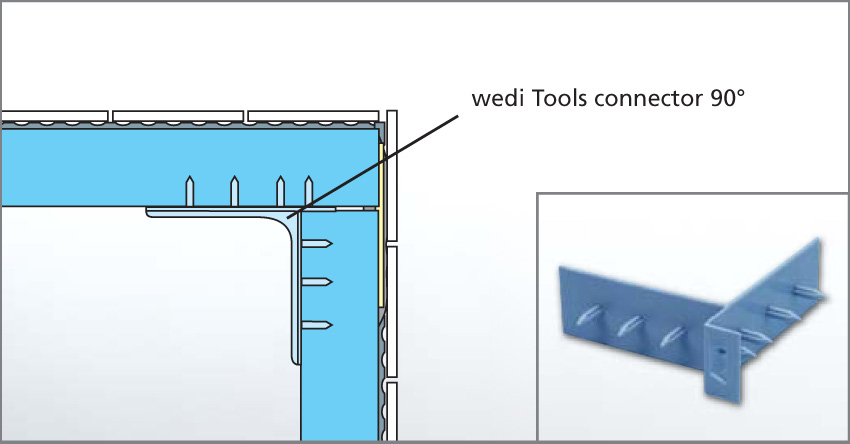
Connection of two building boards with an angle of 90°. |
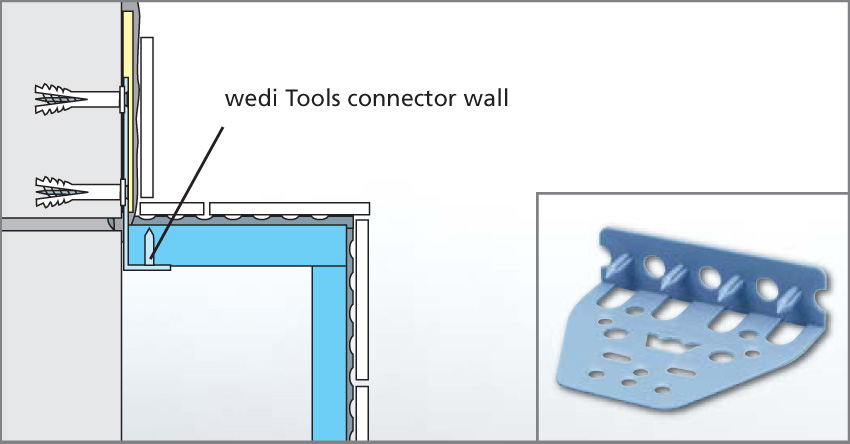
Fastening of building board structure to a wall. |
||||||
|
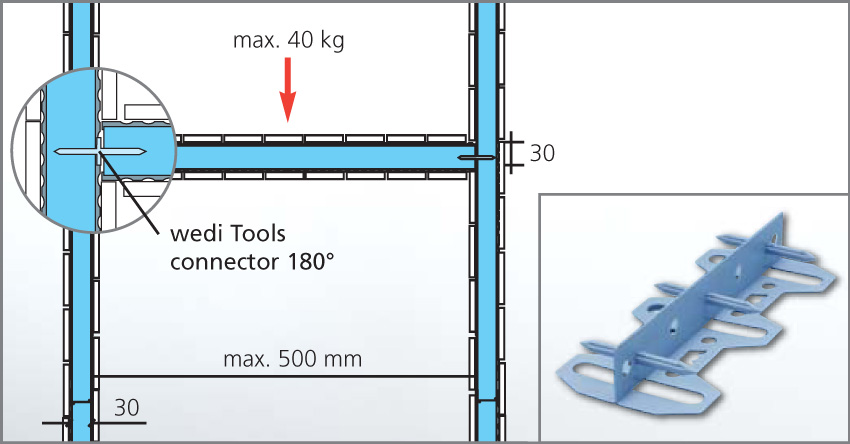
Load-bearing capacity and exemplary use of wedi Tools connector 180° |
Load-bearing capacity. |
||||||
|
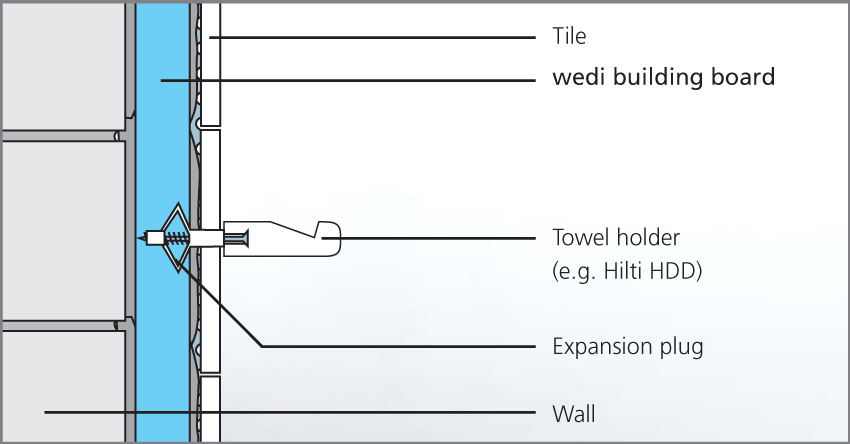

Attachment parts
Fastening and installation of bathroom furniture and accessories
|
|
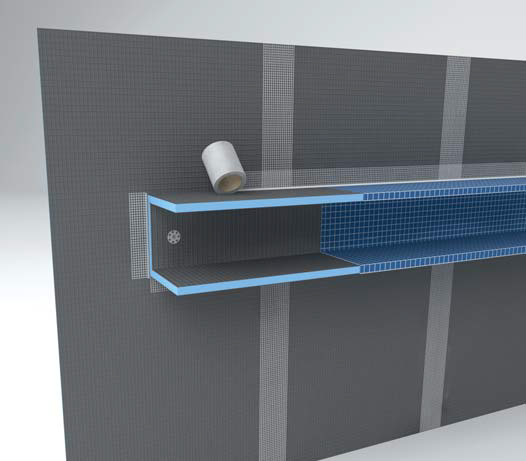
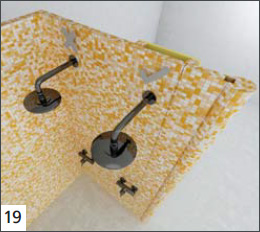
Reinforcement boards can be integrated into the wedi building boards to further stabilise the wall and floor surfaces. Only a few steps are required to grant additional stability for heavy objects such as shelves, towel holders or radiators.
|
|
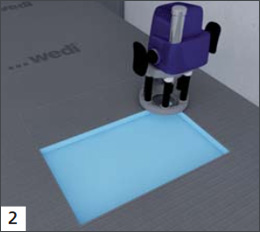
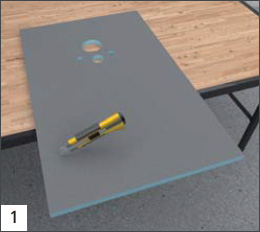
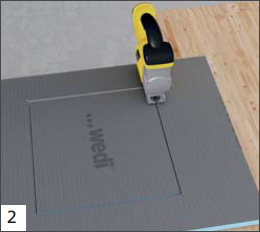
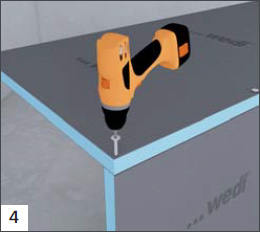
Mark the exact position for the reinforcement board. |
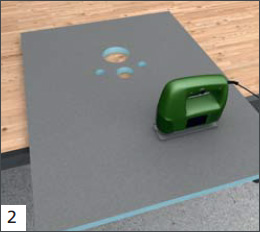
Cut the marked area by using a router. The depth depends on the thickness of the reinforce-ment board. The adhesive adds further 2 mm. |
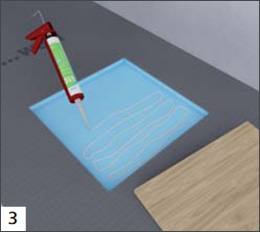
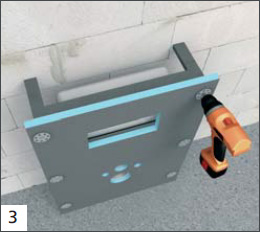
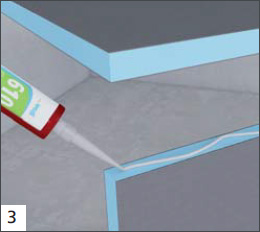
Bond reinforcement board flush-mount by using wedi 610 adhesive sealant. |
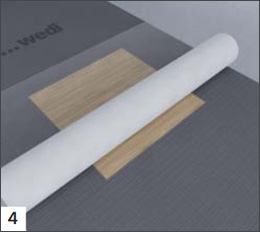
Then, reinforce with self-adhesive wedi Tools reinforcement tape. |
|
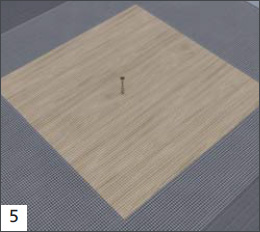
Finally, mark the reinforcement board e.g. with a centrally positioned screw. |
i Important information: Reinforcement boards = multi-layer |
Prefabricated building board elements
wedi Bathboard | Bathtub cladding
|
|
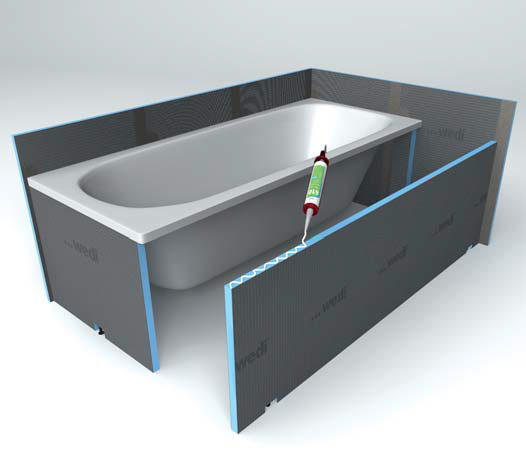
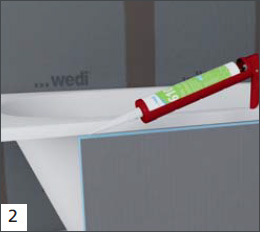
12 The wedi Bathboard cladding – made of the 20 mm wedi building board – has sparked something of a revolution in the cladding of bathtubs and showering trays. Height variations of up to 10 cm in rough concrete or screeding can be compensated for during installation using height-adjustable feet. Installing a control framework is not mandatory.
|
|
Fit the support in the wall area. |
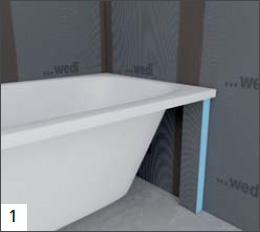
Apply wedi 610 adhesive sealant along the top edges of the building boards. |
Sit the elements under the edges of the bathtub and make the necessary adjustments. |
|
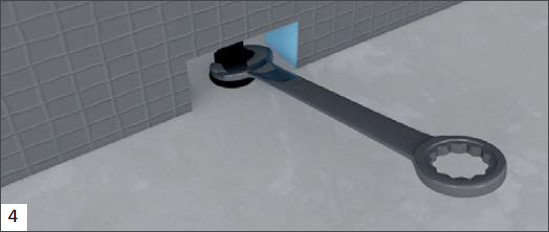
Adjust the height of the feet using an open-jawed spanner (size 17) or pipe wrench so that the wedi bathboard sits securely under the edge of the bathtub. |
Assembly is also possible without an inspection window. If required, an inspection opening can be created at any time. |
Prefabricated building board elements
wedi Mensolo-L / -U | Pipe covering
|
|
Boxing in pipes using conventional materials takes time, creates mess and rarely creates an ideal substrate for tiling. This task can be done quickly and cleanly using wedi Mensolo angle units.
|
|
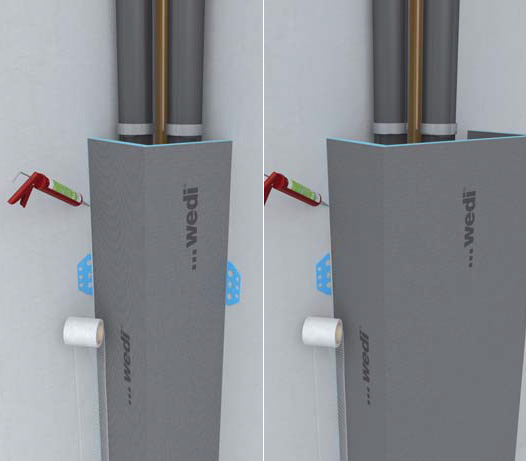
Cut the L-shaped wedi Mensolo angle unit to the required length. |
Affix the L-shaped wedi Mensolo angle unit to the wall with wedi 610 adhesive and sealant. Provide the corner joint with self-adhesive wedi Tools rein-forcement tape. |
Alternatively, screw it to the wall using wedi Tools connectors and screws. |
Provide the corner joint with self-adhesive wedi Tools rein-forcement tape. |
|
The tiling or plastering can then be carried out. |
|
Prefabricated building board elements
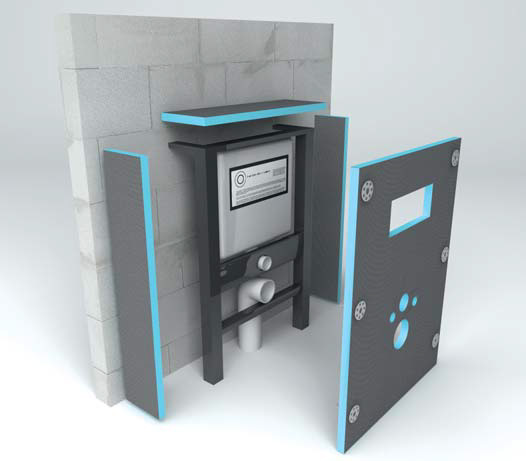
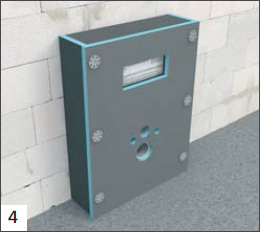
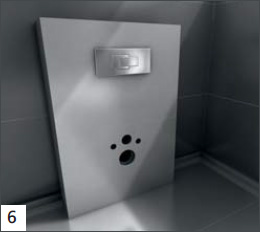
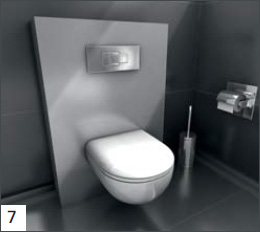
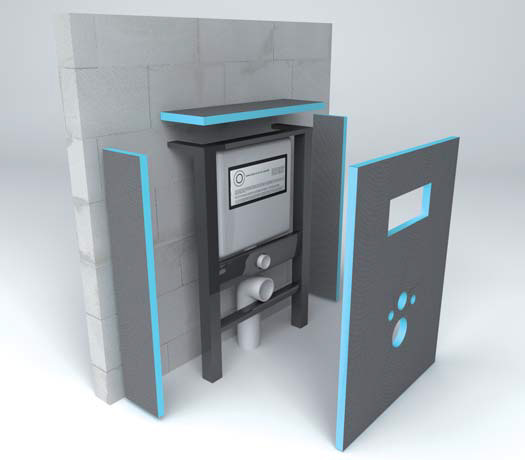
wedi I-Board | WC drywall installation (mechanical fixing method)
|
|
wedi I-Board (1200 x 1245 x 20 mm) is a prefabricated fitting element for cladding of wall-mounted WCs. With a width of 1,200 mm, it can easily be adapted to virtually all specific needs. Despite its light weight, it is extremely strong and stable (up to 400 kg from a tile size of 10 x 10 cm). The installation cladding board can be tiled directly after fitting without further pre-treatment.
|
|
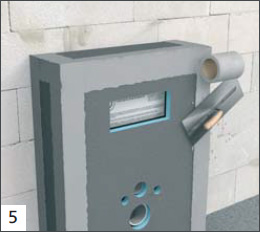
First cut the wedi I-Board to the required size with a utility knife. |
Using a jigsaw, cut out a suitable opening for the flush actuator. |
The prepared and cut I-board is mechanically attached to the dry wall installation using the supplied rapid fit screws in conjunction with the washers. |
Now attach the previously cut strips of wedi I-Board to the top and sides with wedi 610 adhesive sealant. |
|
Apply self-adhesive wedi Tools reinforcement tape to the joints and connection areas. |
The wedi I-Board can be tiled directly after reinforcement without further pre-treatment. The joints between the wall covering and the flooring and the corner joints of the wall covering should be formed as expansion joints. |
Prefabricated building board elements
wedi I-Board | WC drywall installation (adhesive bonded)
|
|
wedi I-Board (1200 x 1245 x 20 mm) is a prefabricated fitting element for cladding of wall-mounted WCs. With a width of 1,200 mm, it can easily be adapted to virtually all specific needs. Despite its light weight, it is extremely strong and stable (up to 400 kg from a tile size of 10 x 10 cm). The installation cladding board can be tiled directly after fitting without further pre-treatment.
|
|
First cut the wedi I-Board to the required size with a utility knife. |
Using a jigsaw, cut out a suitable opening for the flush control. |
Attach the wedi I-Board on the framework using wedi 610 adhesive sealant. |
Now attach the previously cut strips of wedi I-Board to the top and sides with wedi 610 adhesive sealant. |

|
Apply self-adhesive wedi Tools reinforcement tape to the joints and connection areas. |
The wedi I-Board can be tiled directly after reinforcement without further pre-treatment. The joints between the wall covering and the flooring and the corner joints of the wall covering should be formed as expansion joints. |
Wall and bathroom furniture construction
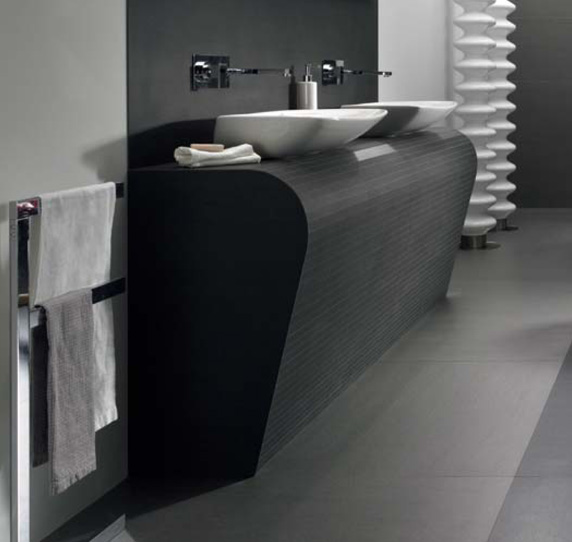
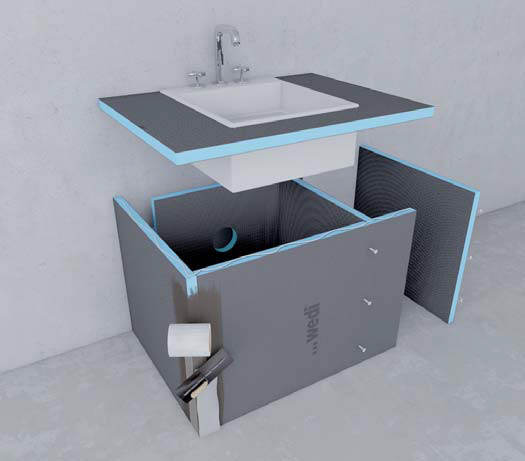
Individual bathroom furniture
|
|
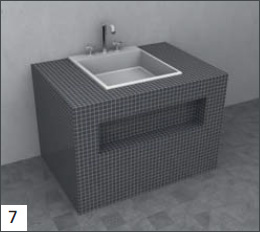
When you start to consider the possibilities for individual design, it soon becomes clear that wedi building boards can be used for much more than just a substrate for walls and floors. The building boards with thicknesses of 30, 40, 50, 60 and 80 mm are perfectly suited for building tileable bathroom furniture. There are no limits to your creativity, whether you are making wash-stand basins, benches, shelves or storage surfaces. The method of use remains straightforward and easy.
|
|
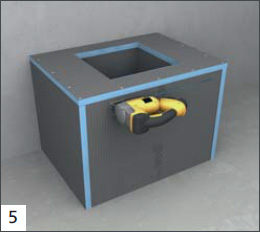
Cut the wedi building board to the desired dimensions for the individually designed bathroom furniture. |
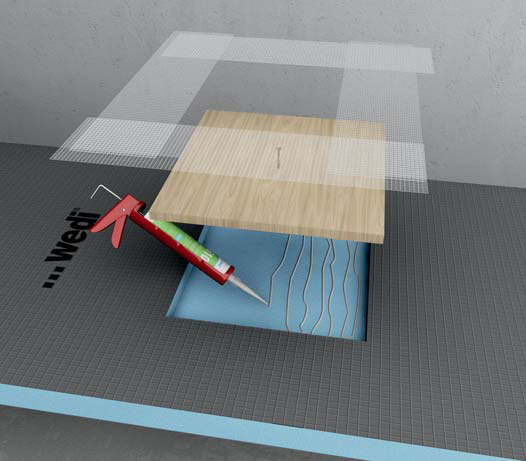
Cut recesses and inspection opening into the building board (tapered cuts), if required. |
Bond the cut building boards by using wedi 610 adhesive sealant … |
… and additionally fasten with self-tapping screws to secure the elements in place during drying of the adhesive. This step can be directly followed by further work. |
|
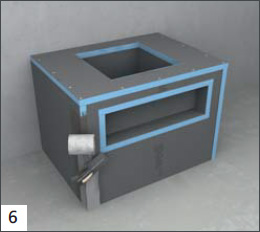
In the following, additional recesses, e.g. for niches, can be cut into the body if required. |
Apply wedi Tools reinforcement tape at joints and edges using tile adhesive, or apply self-adhesive wedi Tools reinforcement tape. |
Individual tiling of the bathroom furniture designed with the building board. |
|
Wall and bathroom furniture
Shelves
|
|
The ready-to-use element wedi Mensolo-U – made of the building board as base material – allows for fast and easy creation of individual shelves with a variety surfaces. These shelves, if tiled, can bear a load of approx. 100 kg over a length of 250 cm.
|
|
Simply cut the U-shaped, prefabricated wedi Mensolo unit to the required length, e.g. for creating shelves. |
Affix the angle unit to the wall with wedi 610 adhesive sealant or alternatively with tile adhesive. Then fix it securely in place with mechanical fixings and cover the joints with self-adhesive reinforcement tape. |
After tiling the customised shelf is complete and ready to use. |
Wall and bathroom furniture
Steps and platforms
|
|
The wedi building board can also be the used for creation of steps and platforms in domestic applications only. After cutting and installation the wedi building board can be finished with any tile based surface covering (min tile dimensions 10 x 10 cm).
|
|
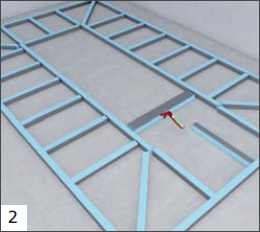
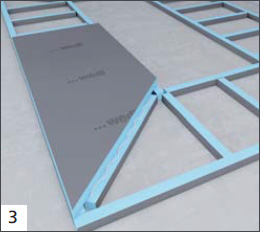
Cut wedi building board to size for creation of the platform struts. |
Apply wedi 610 adhesive sealant to the surface edges, set a maximum distance apart of 40cm. |
Affix building board as cover onto the platform struts using wedi 610 adhesive sealant. Board joints must always be supported and correspond to a strut beneath. |
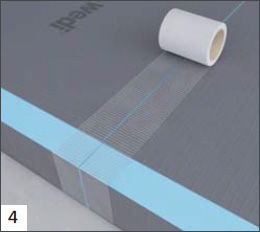
Apply self-adhesive wedi Tools reinforcement tape to all joints. |
Wall and bathroom furniture
Partition walls
|
|
When using the wedi building board for partition walls, this offers the possibility to separate rooms. Installation is easy and fast, and the design is virtually unlimited due to the huge variety of possible finishes.
|
|
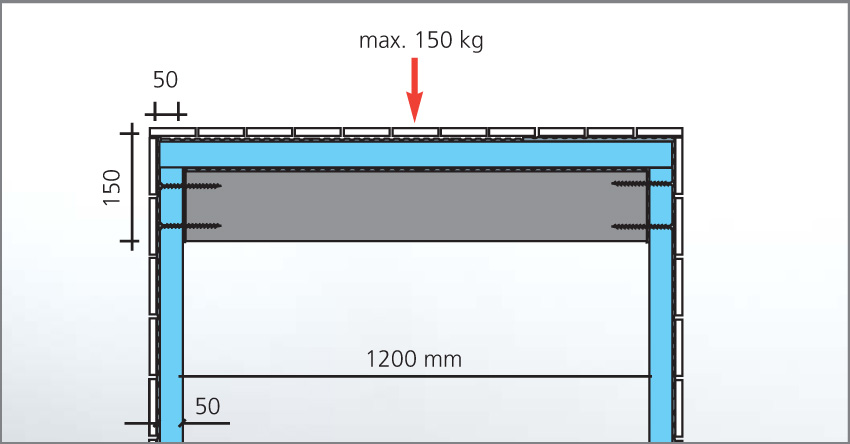
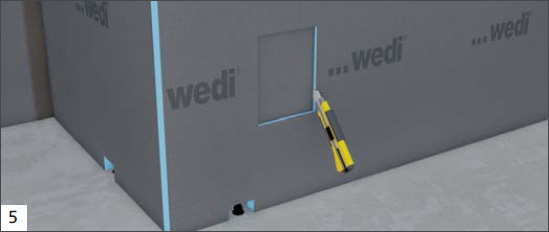
Cut the wedi building board to the desired size. wedi building boards from thickness of 50 mm are suited for walls. |
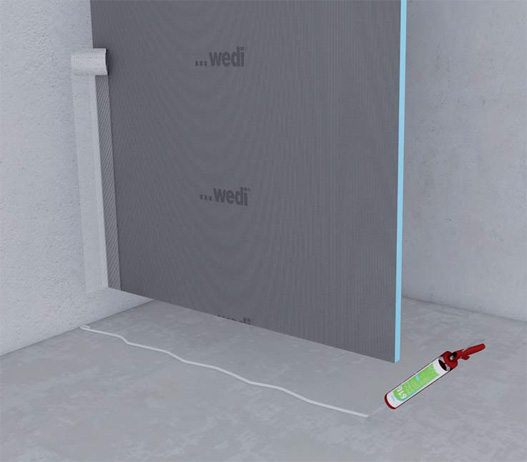
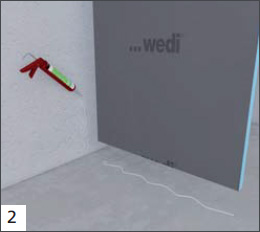
Affix the wedi building board to the wall or floor by using wedi 610 adhesive sealant. |
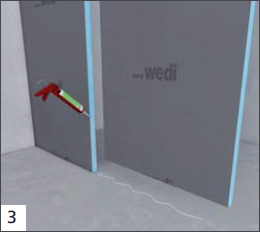
Further building board elements are affixed to each other and to the floor by using wedi 610 adhesive sealant. The maximum wall length is 1200 mm. |
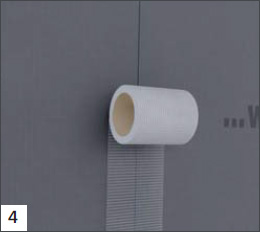
Apply self-adhesive wedi Tools reinforcement tape to the joints between the building boards. Installation of doors requires previous installation of reinforcement panels. |
Wall and bathroom furniture
Individual shapes
|
|
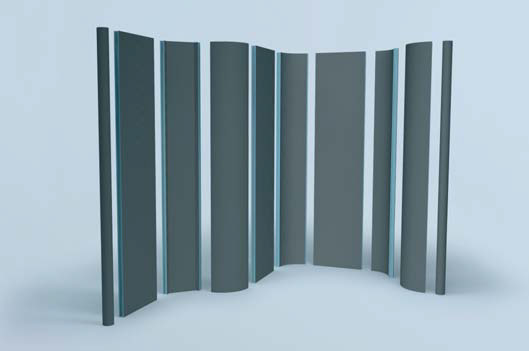
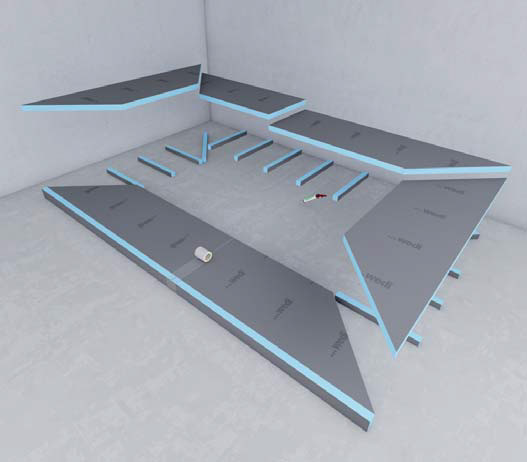
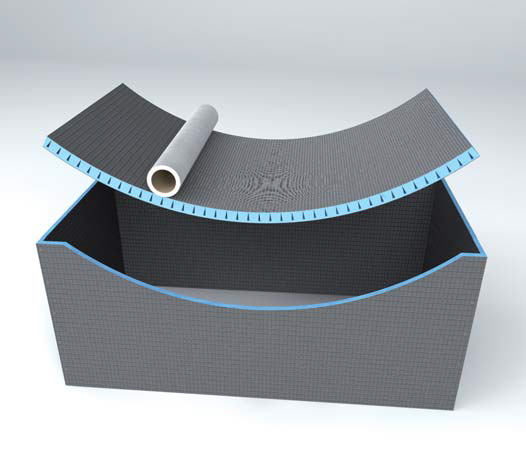
The wedi Construct building board opens up any possibility in the design of curved shapes. Whether you wish to achieve tight radii or semicircular solutions, the Construct building board grants you plenty of scope to develop your ideas for virtually all applications. Since Construct building boards exhibit the usual high quality in terms of moisture protection and thermal insulation, irrespective of their shape, sustained high technical standards are guaranteed, along with room to allow you to explore your creative side.
|
|
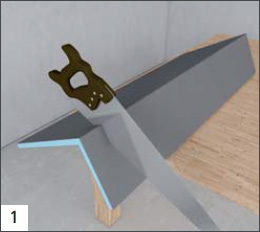
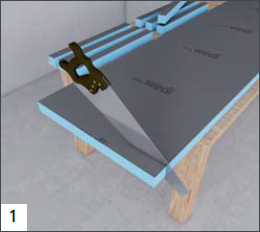
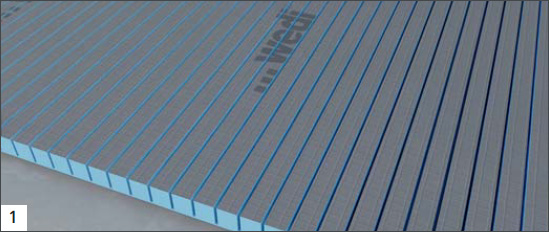
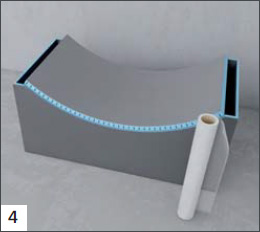
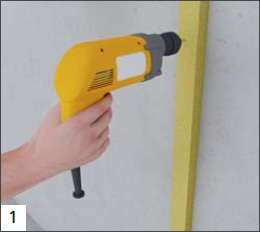
Pre-cut wedi Construct building boards come in longitudinal and transverse cut designs. |
To shape the building board according to your wishes, you should first create a type of template, e.g. out of wood or wedi building board. |
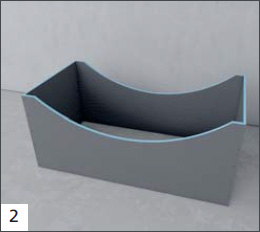
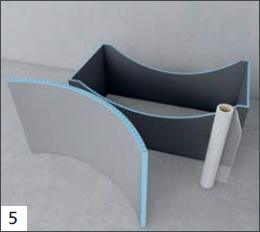
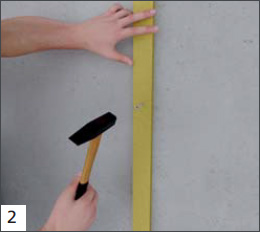
Then place the wedi Construct building board flush along the structure, with the incisions facing inwards … |
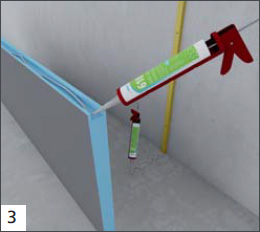
|
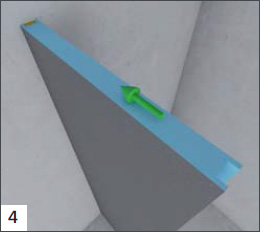
… and apply wedi Tools reinforcement tape and tile adhesive. |
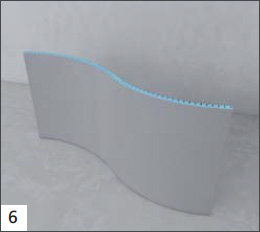
Once it has dried, the building board will be set in the intended shape and can then be processed further as normal or however you wish. |
A wide range of other shapes are possible using the wedi Construct building board. All you need is a template shaped to suit your wishes. |
|
Walls
Freestanding wall systems
|
|
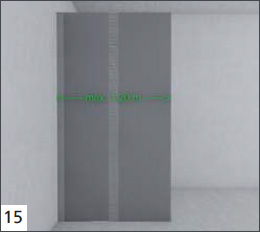
With the modular wedi Moltoromo system, versatile wall configurations can be created effectively for different bathroom and wellness applications. Round shapes, angled solutions or curved lines, for example, can be installed quickly and easily.
|
|
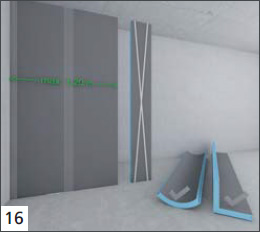
Pre-drill the holes for the mechanical fixings (diameter: 6 mm). |
For connection to the wall, vertically attach the wall and door fixingset by using mechanical fixings. |
If a door is to be fastened, wedi 610 adhesive sealant is applied onto the wall and door fixing set ... |
... and then the wall and door fixing set is bonded and reinforced with wedi Tools reinforcement tape. |
|
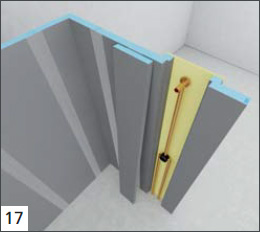
An installation block is inserted on the floor to stabilise the Moltoromo wall elements. The installation block is positioned in the specified groove in the wall element. |
Before installing the tongue, an evenly applied layer of wedi 610 adhesive sealant is applied in the groove. |
Connection of two Moltoromo wall elements makes it necessary to insert the tongue into the groove before the glue has cured. In such case, the bottom of the tongue rests on the installation block. |
To mount the following elements on the already installed tongue, their grooves should also be coated with wedi 610 adhesive sealant first. |

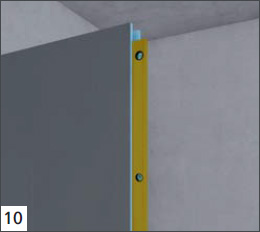
Walls
Continuation of installation steps
|
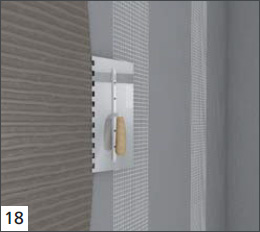
Bond adjacent element to the wall element. |
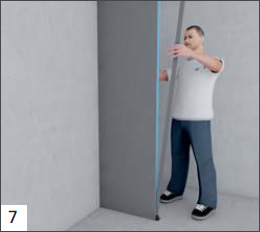
Check vertical position and alignment of the wall elements by using a spirit level. |
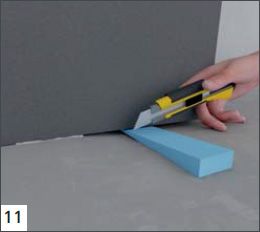
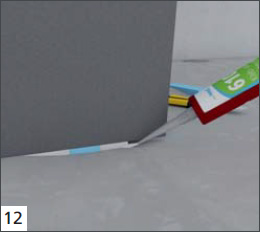
Use slope wedges to compensate floor irregularities or slopes e.g. with Fundo floor elements. Slope wedges can be easily cut to the required size by using a knife. |
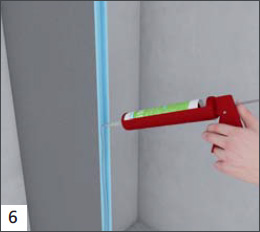
Close the open joint by using wedi 610 adhesive sealant. |
|
Further wall elements can be installed individually using the same principle (steps 5 – 10). |
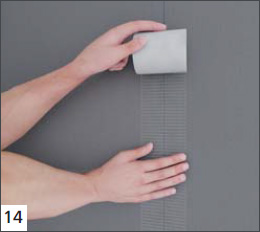
Before tiling, joints between boards are covered with selfadhesive wedi Tools reinforcement tape. |
The straight wall created by the wall and follow-on element may not be more than 1.20 m long. |
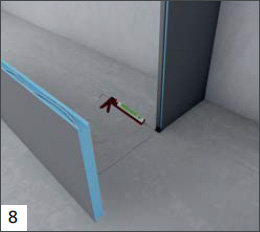
Then, direction should be changed by using an angular or round wall element. |

|
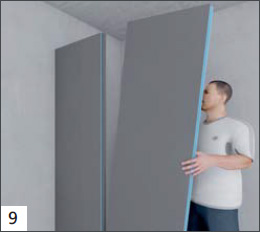
Place the next element, e.g. a supply element. |
Finally, the Moltoromo wall elements can be individually tiled. |
Fittings etc. can be attached onto or into the wall elements with supply well. |
|
|
|
|

Things to Know & Technology
-
 wedi fundo fino 7.1 tileable grid - square - 115x115x8mm£160.52 £133.77 As low as £157.38
Let yourself be inspired
Learn More
Whether made from simple or brushed stainless steel, round or square or as a screw-fastened variant – the Fundo Fino series offers 12 design alternatives to the supplied drain cover (Fino1.1). Thanks to the large selection, there is a suitable drain cover for everyone.